A WooCommerce store is a must-have for anybody launching an e-commerce business.
When opening an online store, entrepreneurs must consider a number of factors. Some of them, such as product development and building a marketing strategy, can be time-consuming and difficult.
WooCommerce, on the other hand, guarantees that adding eCommerce functionality to your WordPress site will not be difficult.
Wplegible will show you everything you need to know to get your WooCommerce store up and running.
Builing a WooCommerce Store
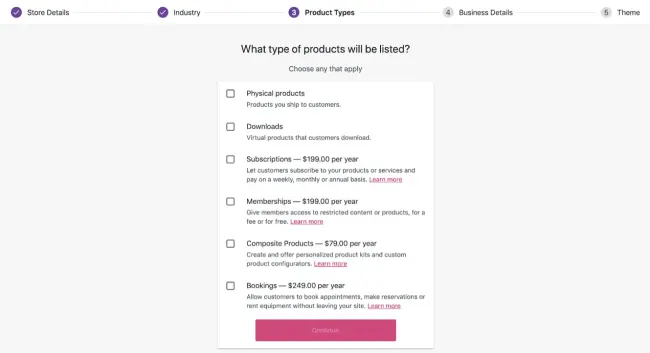
Every new WooCommerce installation starts with a setup wizard that walks you through the basics of setting up your store. It will ask you questions about your location, industry, and commodities in order to generate recommendations that are specific to your requirements.
You will also be able to install extensions that provide additional functionality for areas such as marketing and certain product types.
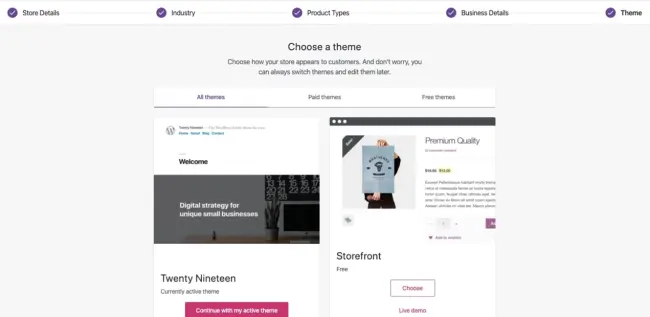
After that, you’ll be requested to install a theme, which governs the look and layout of your site.
You may skip this step if you already have a WordPress site and your theme is WooCommerce supported. If you’re starting from scratch, select a theme that best meets the needs of your shop and brand.
You may then activate WooCommerce Shipping and WooCommerce Tax. While these free extensions are totally optional, they give a slew of useful features that make your life as a business owner easier.
WooCommerce Shipping offers USPS and DHL shipping label savings, as well as the option to print labels straight from your dashboard. WooCommerce Tax calculates sales tax automatically based on your area, so you don’t have to bother about specifying rates.

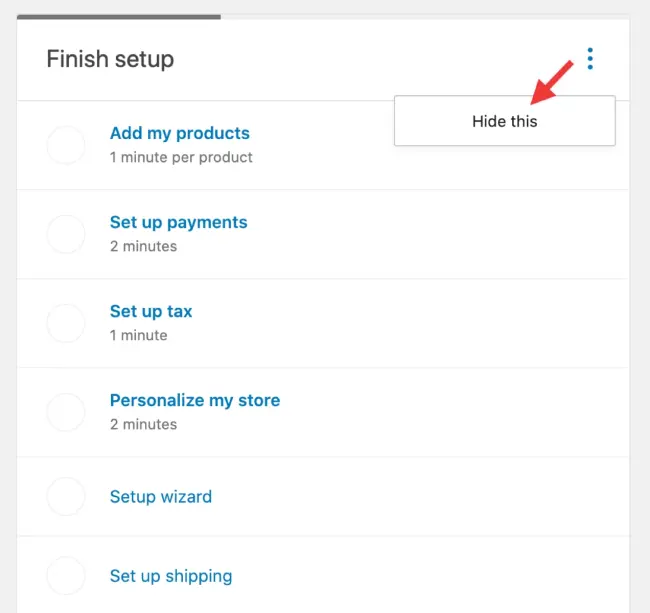
Finally, you’ll see a store checklist that may be used to set up the rest of your store. When you select an item from the list, you will be sent to the corresponding settings page. While you may skip these and return to them later, let’s take a closer look at each one.
Add Products
You may add items manually, import a spreadsheet, or migrate from another platform if you choose Add my products in the wizard.
If you select to manually add a product, you will be brought to a blank product page. Alternatively, on the WooCommerce store dashboard, click to Product -> Add Product. There, you may provide a product title, description, and photo, as well as price, shipping, and other details.
If you’re already familiar with WordPress, you’ll note that WooCommerce product pages are organized differently from standard pages and posts.
For example, the primary text box on a brand-new WordPress page will not contain your product description. That crucial paragraph goes in the “brief product description” area further down the page.
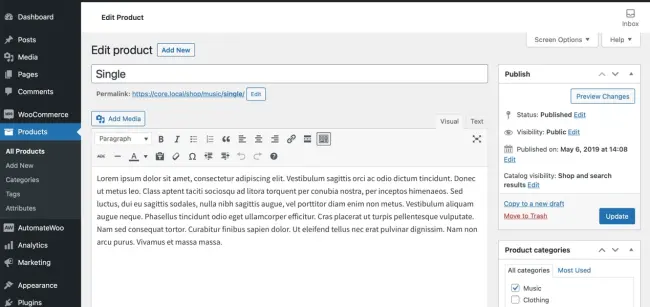
Instead, the wide text block at the top is a fantastic location to put product specifics such as construction, components, or country of origin — any secondary information you want to offer that isn’t essential to selling the item.
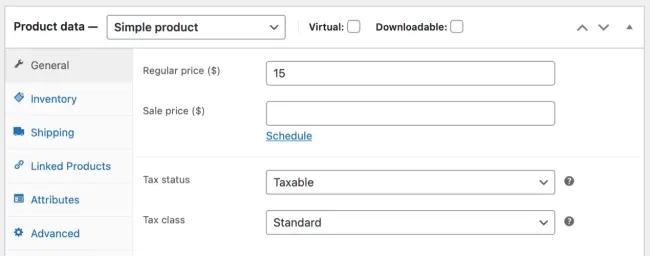
You must also select a product type. There are many different sorts of products, but the most popular are basic and variable.
Basic things, such as books, have no alternatives or choices. When purchasing variable things, such as a shirt in many sizes and colors, customers can choose from a range of options.
Set up payments
If you use the wizard to set up payments, you’ll be able to pick a payment gateway on the same screen.
Otherwise, navigate to WooCommerce -> Settings -> Payments. You can accept cash, cheque payments, or direct bank transfers. Set up a payment gateway if you want to charge consumers online.
A payment gateway securely collects credit card information from your consumers, validates it, and then sends the funds to your bank account. There are several payment channels to select from, including PayPal and Stripe.
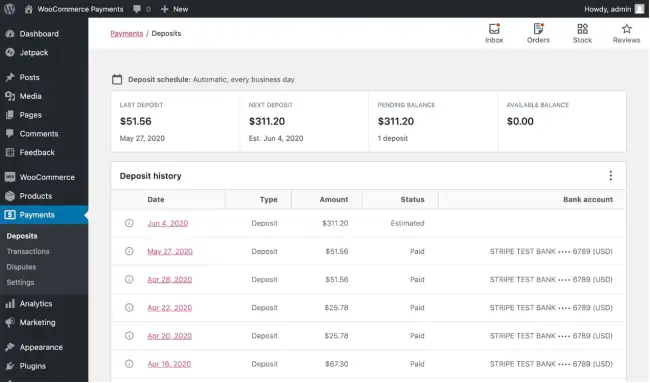
Install the free WooCommerce Payments extension for a dependable setup.
You can get started in a matter of minutes, keep consumers on your site during the checkout process, accept Apple Pay, and handle everything from payments to refunds straight from the WooCommerce dashboard. You can receive additional perks like as fast deposits and payments in many currencies.
Set up tax
To configure taxes for your WooCommerce store, use the wizard or go to WooCommerce -> Settings -> Tax. You may enter product pricing with or without tax, specify the address on which to base tax computations, and define your tax rates, among other things.
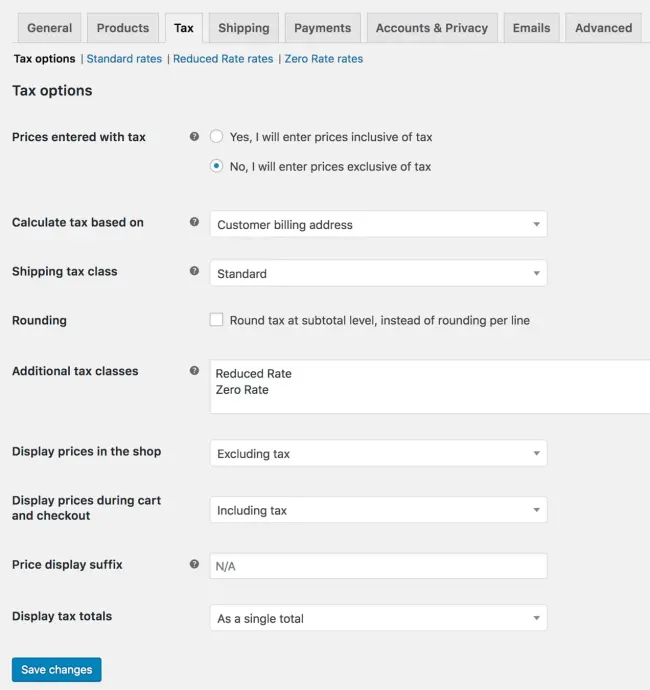
You should conduct some study on tax rates based on where you live and where you sell, and you should consider contacting an expert. Alternatively, simply install WooCommerce Tax to handle everything for you.
Personalize your store
By clicking Personalize my shop, you can easily create a homepage, upload a logo, and create a store notice that will appear on all pages of your site. You can always edit these afterwards, so don’t worry.

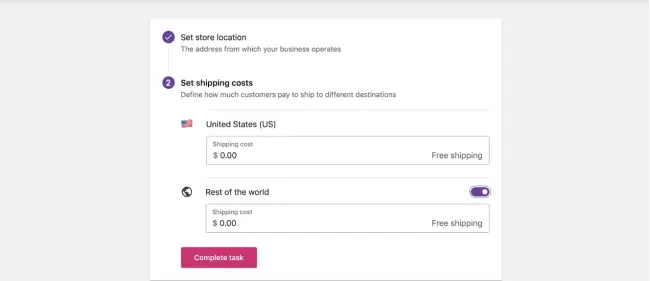
Set up shipping
Using the setup procedure, you may authenticate your store’s location and determine shipping rates for your country and the rest of the world. This covers basic shipping configurations; however, for more advanced settings, navigate to WooCommerce -> Settings -> Shipping. You may set up delivery zones (areas where things are delivered) as well as options like free shipping.
Try WooCommerce Shipping for a quick, simple setup, easy label printing, and shipping rate reductions. Install WooCommerce Table Rate Shipping if you require more complex rules, such as pricing depending on weight or cart totals.
Add More Design and Utility
Your WooCommerc store basics are ready to go once you’ve completed the steps in the setup process. However, depending on your company and items, you may need to take care of a few more things.
Make extra pages
If you already have a WordPress site, you’ve undoubtedly generated all of the necessary pages (e.g. a homepage, about page, contact page, etc.). However, if your site is spanking new, you’ll want to have things set up right away.
The theme you choose did a lot of the design work for you, which you can then adjust to meet your brand and shop (see your theme documentation for details). You may also use the drag-and-drop WordPress editor to create aesthetically attractive content to any page.
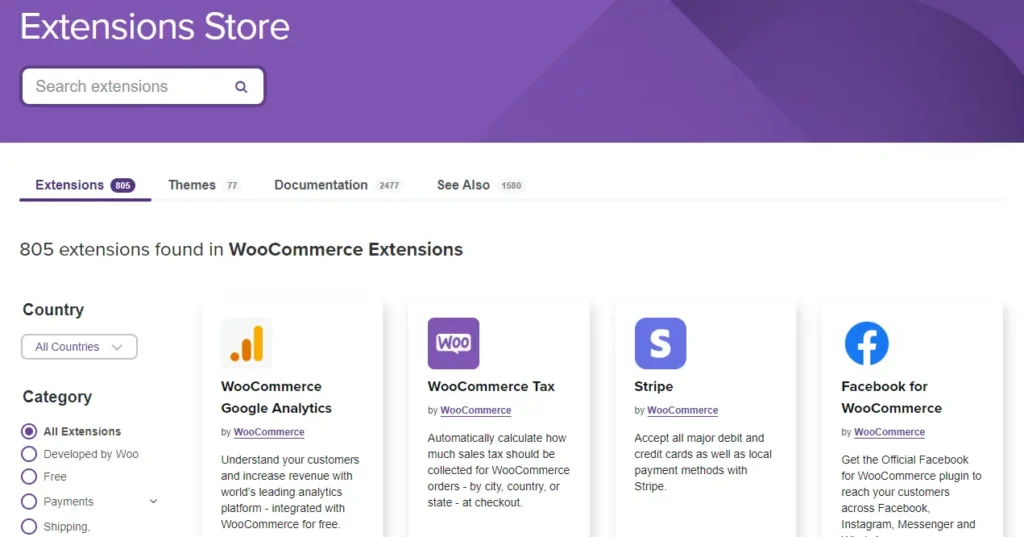
Add extensions
WooCommerce extensions are similar to WordPress plugins, with the exception that they are WooCommerce-specific additions. Not every store will need extensions; WooCommerce contains all of the necessities out of the box, but you may need others for additional functionality.
We’ve already discussed a few extensions for different types of products (such as memberships or subscriptions), shipping, payments, and taxes. There are, however, outstanding marketing, store administration, and user experience alternatives. All extensions may be found in the WooCommerce Marketplace.
However, it is critical not to get too carried away. Installing too many might cause your site to slow down and clutter your dashboard. Instead, prioritize those that improve the overall user experience.
Keep your store safe
Everything, from content and purchase information to customer data, may be secured in a few simple steps.
Consider purchasing Jetpack Security, which contains everything you need to safeguard your WooCommerce store, from backups and virus scans to spam prevention, for a simple, quick setup. Alternatively, use Jetpack’s free security solutions, such as brute force attack protection and downtime monitoring.
Conclusion
And that’s all the basics you need to know to be able to build yourself a WooCommerce Store. If you found this article helpful, leave us a comment below.