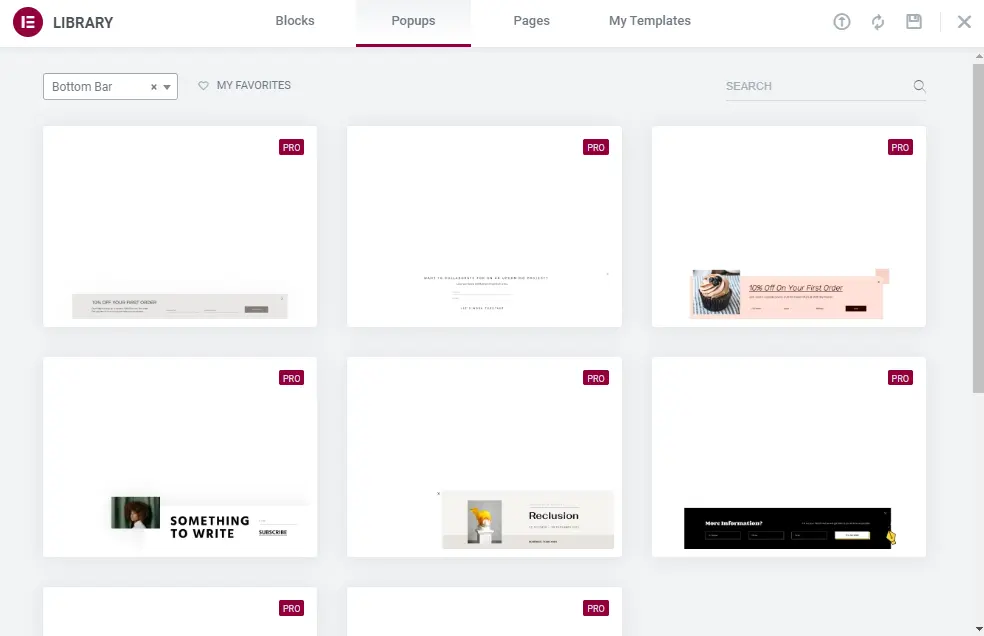
Elementor Popup is a powerful drag-and-drop popup builder designed to help you create stunning popups for your websites. With this popup builder, you can easily create any kind of popup with an easy-to-use interface. You can customize the look and feel of your popup, add animations, and more.
Elementor Popup also offers a variety of features that make it easier to create engaging popups for your website. You can use it to increase conversions, build email lists, and more.
In this article, we will show you how to use Elementor popup in the most basic way possible so that you can take advantage of this tool.

Elementor Popup Builder Tutorial – Step by Step Guide to Build Your Popup
Creating a successful popup for your website can be a daunting task. Fortunately, with Elementor Popup Builder, you can easily create and customize stunning popups in no time. This tutorial will guide you step-by-step on how to build your popup like a pro using Elementor Popup Builder.
How to create Cookie Consent Popup
Having a cookie consent popup on your website is no longer an option, but a necessity. This popup helps to inform visitors about the cookies used on your site and give them the choice to accept or reject them.
Creating a cookie consent popup is easy with Elementor Popup Builder. It allows you to quickly create and customize a popup in minutes with its drag-and-drop interface and ready-made templates.
Following are the steps to create a Cookie Consent Popup:
- You go to Templates, select Popups -> Add New and give your Popup a name. Another way is to press CMD + E or CTRL + E to open Finder. Then you search for Popup, select Add New Popup and give it a name.
- Next, you choose a pre-designed Popups template or close the Library overlay and design your Popup from scratch. Then you select Bottom Bar so that Cookie Consent Popup appears in the footer.
- You customize the content, layout for the option to accept Cookies. At the Content Button, you enter the appropriate text like “Accept & Close”. Go to Link -> Popup, select Yes for “Do not show again”. Next, you choose the color and layout for your Popup Cookie Consent.
- Finally, you create content for the customer’s Decline option. You just need to right-click the Button widget and select Duplicate. Now you can style this Button similar to the step above, just change the text content to “Decline”. Besides, you can set the layout, color, display time for your Popup, click save and close button.

Elementor Popup for Login Form
As a first step, you also design the popup and create the content for it. You can also change the size and position and add images to the popup. The login button in the popup can then be added and customized. To do so, navigate to the Button -> Content widget:
- Button -> Link: You click the dynamic icon, and in the Actions section, you select Popup.
- Select Toggle Popup from the Actions menu once more.
- Enter the name of the Login widget you just created in the Popup field to search.
- Click the Update button.
Elementor Popup for Hello Bar
The Popups feature in Elementor can also be used to create Hello Bars, which are frequently used to announce promotions. You must also create a popup as instructed in the preceding steps.
In the gallery, you can select Hello Bar or create your own design by opening the drop-down menu. Following that, you can customize the layout, content, and so on for your popup.
Elementor Popup for Subscribe Form
After the visitor has viewed three pages of your website, this window will appear. First, you create a popup and customize its content, layout, and so on. You specifically configure the following for the Publish Popup section:
- Conditions: You click Add conditions and select Entire Web page -> click Next.
- Triggers: Set to Yes and enter for 2 (seconds), then click Next.
- Advanced Rules: Under Display after X pageviews, set it to Yes and enter 3, then click Save and Close.
Elementor Popup for Popup Shopping Cart
Create a Shopping Cart Popup on the checkout page to encourage users to buy something. To use the Elementor Popups feature, perform the following steps:
- Create and set the layout and design parameters for your Popup.
- Set Condition and Trigger:
- Conditions: You choose Singular, select All pages -> Choose Page. At this time, enter the name of the checkout page so that the Popup will pop up here.
- Triggers: In the After Inactivity section, enter the number of seconds you want.
- Click Save and Close.
Elementor Popups: Conclusion
And that concludes our basic tutorials on Elementor Popup. If you have any questions, please leave them in the comments section below, and we will respond as soon as possible.


