Elementor and WooCommerce make it simple to set up an online shop. In this article, we’ll teach you how to create an online store with WooCommerce, WordPress, and Elementor, complete with items, categories, and an Amazon-style dropdown menu.
Why you choose WooCommerce?
WordPress is one of the most popular blogging systems in the world, but it is also used by many companies to sell their products and services.
With the WooCommerce eCommerce plugin, you can use WordPress to sell digital and physical items and accept payments using major payment gateways such as PayPal and Stripe.
WooCommerce is now used by 29% of the top million websites, and famous brands like the All Blacks, L.A. Weekly, and AeroPress all rely on this popular WordPress eCommerce plugin.
While WordPress and WooCommerce give everything you need to start a successful eCommerce site, you may desire greater control over the aesthetic of your store.
In this tutorial, we will install Elementor and WooCommerce and build an online store.
Using Elementor Pro to Create a WooCommerce Store
The first step is to include Elementor into your WordPress site.
The main Elementor plugin is free to download and includes over 40 widgets and 30 layouts. However, because we’re using WooCommerce, you’ll need to purchase an Elementor Pro membership.
Elementor Pro, unlike the free version, has a specialized WooCommerce Builder as well as other crucial eCommerce-themed widgets such as Add to Cart, Product Rating, and Related Products.
If you choose to utilize the free Elementor plugin, this lesson will teach you how to use the Elementor user interface and the fundamental processes required to create professionally designed pages, websites, blogs, and online businesses. You will need an Elementor Pro subscription to complete all sections of this lesson.
We assume you already know how to create a basic WooCommerce page. If not, then read our article on how to build a WooCommerce store.
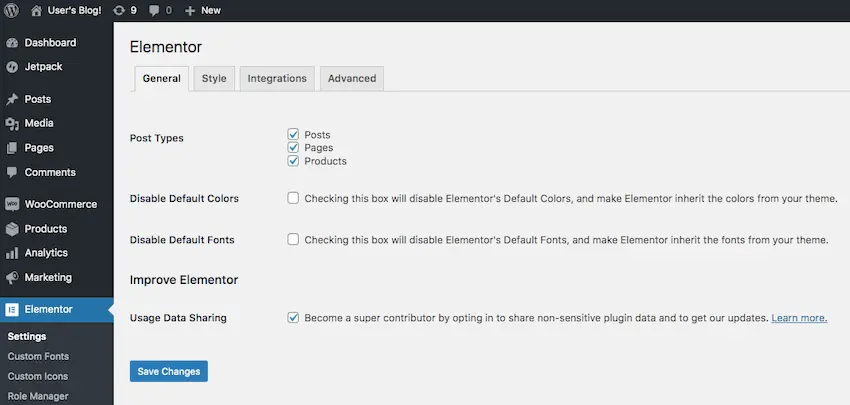
First, Elementor’s capabilities must be expanded to incorporate WooCommerce products:
- Select Elementor -> Settings from the WordPress left-hand menu.
- Select Products from the Post Types menu.
Using Ready-Made Templates in Elementor Pro
Elementor offers a variety of templates that may radically transform the appearance and feel of your website, as well as provide extra functionality. These professionally created templates may take a lot of the guesswork out of creating an eCommerce site, so let’s start there.
In this section, I’ll teach you how to personalize two WooCommerce-generated pages: your product archive and product pages.
WooCommerce Single Product Page Redesign
Product pages are where visitors examine and eventually buy your items, so they must look beautiful and deliver all of the features your buyers want.
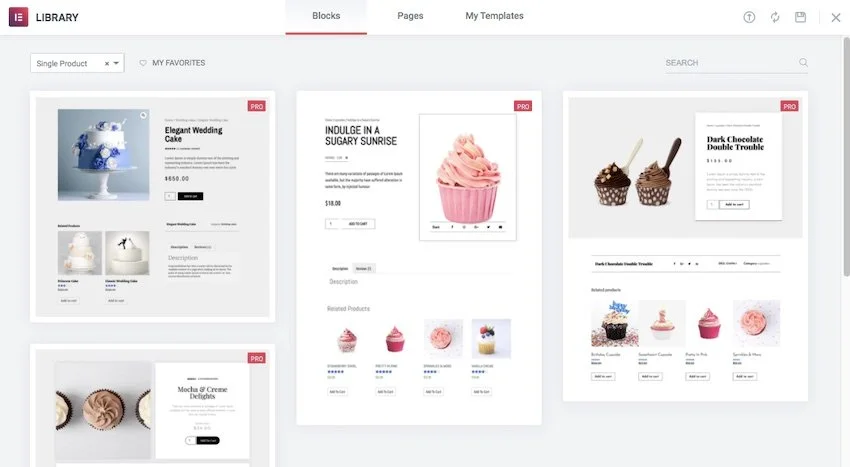
Elementor Pro includes a number of product page layouts, so let’s put them to use:
- Select Templates -> Theme Builder from WordPress’s left-hand menu.
- Choose the Add New option.
- Select Single Product from the Template type option.
- Give your template a name and then press the Create Template button.
Elementor Pro will now show you all of the possible Single Product templates; choose the one you wish to use.
The Elementor editor will now open with this template. You can make modifications to your selected template at this point, but for now, we’ll simply go ahead and publish ours:
- Select Publish from the Elementor Panel.
- Open the Include option in the following window and make sure Products is selected.
- Click Save & Close.
Making WooCommerce Product Archive
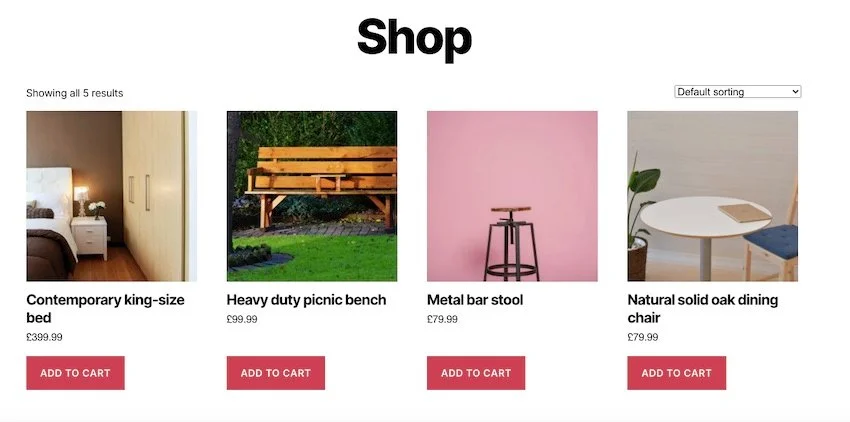
The product archive is a list that contains all of your items in one place. When you installed WooCommerce, this plugin automatically created a product archive to your website, albeit the style and feel of the archive will differ based on your WordPress theme.
This automatically created product archive does not appeal to you? You may quickly and simply update it with any of Elementor’s product archive templates:
- Select Templates -> Theme Builder from WordPress’s left-hand menu.
- Choose the Add New option.
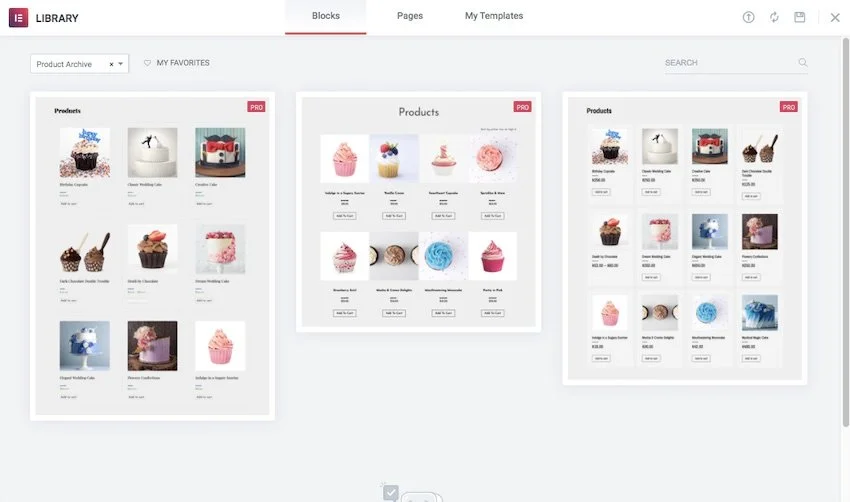
- Select Product Archive from the Template type option.
- Give your template a name and then press the Create Template button.
Elementor Pro will now show you all of the possible Product Archive templates; choose the one you wish to use.
- The Elementor editor will now open with your chosen template.
- If you’re satisfied with your selected template, click the green Publish button to make it public.
- Open the Include option and choose All Product Archives in the ensuing popup.
- Click Save and close.
This newly updated product archive will now be shown on your website.
Conclusion
In this post, we built a whole internet store. This WooCommerce site includes everything you need to get started selling things, all wrapped up in your choice of professionally designed Elementor Pro designs.